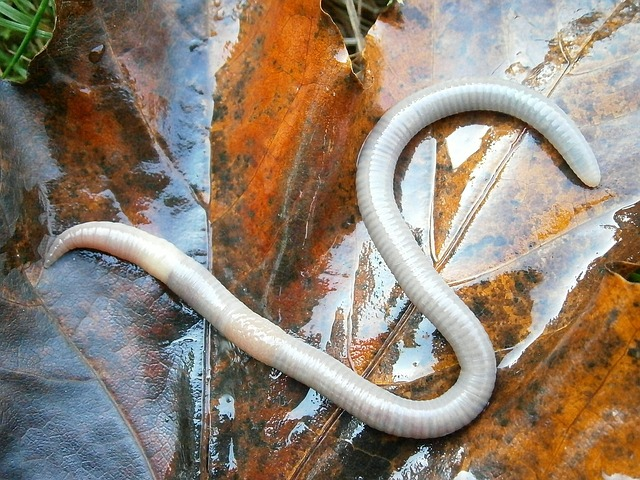
Welcome to the world of worm composting! Here, kitchen scraps become nutrient-rich compost for your plants. Whether you’re a gardening enthusiast or new to eco-friendly practices, worm composting offers a sustainable way to manage food waste and nurture your garden or indoor plants.
In this guide, we’ll cover the basics of worm composting, including setting up a worm bin and avoiding common pitfalls. You’ll learn about the wonders of composting worms and how to troubleshoot any issues that arise.
From choosing the right container and bedding materials to feeding strategies, we’ll equip you with the knowledge to start your worm composting journey. Join us as we explore the ins and outs of this eco-conscious practice and empower you to become a successful worm composter.
Worm Composting for Beginners – What is Worm Composting?
Embarking on your first worm composting adventure? Congratulations! It’s a game-changer for your garden and the environment. Worm composting is nature’s way of recycling food scraps into nutrient-rich fertilizer using worms. These little wrigglers become your compost superheroes, transforming waste into dark, crumbly worm castings. It’s like setting up a gourmet buffet for them, and in return, they gift you with valuable soil amendments.
Worm composting is magical. Your kitchen scraps, coffee grounds, and tea bags turn into nutrient-rich compost that your plants love. To get started, you’ll need a worm bin—a cozy home for your composting heroes. Red wigglers and red worms are the stars of the show. Provide them with comfortable bedding made of shredded paper, leaves, or coconut coir. Layer in your vegetable scraps, coffee grounds, and tea bags. Voila! You’re creating nutrient-rich compost while reducing food waste.
Remember, this is about creating a thriving ecosystem within your worm bin. Your worms are like garden ambassadors, converting waste into valuable soil amendments and maintaining balance.
Mistakes to Avoid When Starting With Worm Composting
Diving into worm composting is an exciting worm composting adventure, but there are a few common pitfalls you’ll want to sidestep for a smoother journey. Let’s navigate through the potential mistakes together to ensure your worm composting adventure is a success right from the start.
Firstly, don’t overload your worm bin with food scraps. It’s easy to get carried away with feeding your composting worms, but too much food can lead to issues like odors, pests, and even an imbalance in the worm bin’s ecosystem. Start small and gradually increase the quantity as your worms adapt and consume their food efficiently. Remember, moderation is key when it comes to feeding your worm pals!
Another mistake to watch out for is using the wrong types of food. Avoid oily, citrusy, or heavily seasoned foods as they can upset the delicate balance within the worm bin. Stick to kitchen scraps like fruit and vegetable peelings, coffee grounds, and tea bags. Your worms have preferences too, so keep an eye on what disappears quickly and what they leave behind.
Temperature matters! Worms are pretty chill creatures, but extreme heat or cold can stress them out. Ensure your worm bin stays within the ideal temperature range of 55°F to 77°F (13°C to 25°C). If it gets too cold, insulate the bin with blankets or move it to a warmer spot. Likewise, in scorching temperatures, keep the bin shaded and moist to prevent overheating.
Don’t forget about bedding! Worms need a cozy home, so providing the right bedding material is crucial. Avoid using materials that are too dense or compact, as this can limit airflow and create a less hospitable environment for your worms. Opt for materials like shredded newspaper, cardboard, or coconut coir to create a comfortable living space for your composting buddies.
Lastly, patience is key. Rome wasn’t built in a day, and neither is a thriving worm bin. It takes time for your worms to settle in and start working their magic. Avoid the temptation to check on them too frequently or disturb their habitat excessively. Let them do their thing, and you’ll soon witness the wonders of worm composting in action.
By steering clear of these common mistakes, you’ll set the stage for a successful worm composting journey. Remember, a little bit of knowledge and patience go a long way in creating a thriving ecosystem within your worm bin. Enjoy the process, learn from your experiences, and watch as your kitchen scraps transform into nutrient-rich compost for your plants’ delight!
Worm Composting Care Checklist
Here’s a handy checklist to ensure your worm composting adventure stays on track:
Suitable Bin: Start by having the right container for your worm composter. Ensure it’s well-ventilated, spacious, and made of materials that won’t harm your worms. You can repurpose plastic containers or invest in purpose-built worm bins for convenience.
Bedding: Provide a cozy bed for your worm buddies! Bedding materials like shredded newspaper, cardboard, or coconut coir create a comfortable environment. Ensure the bedding remains moist but not too wet, and fluff it up occasionally to keep it airy.
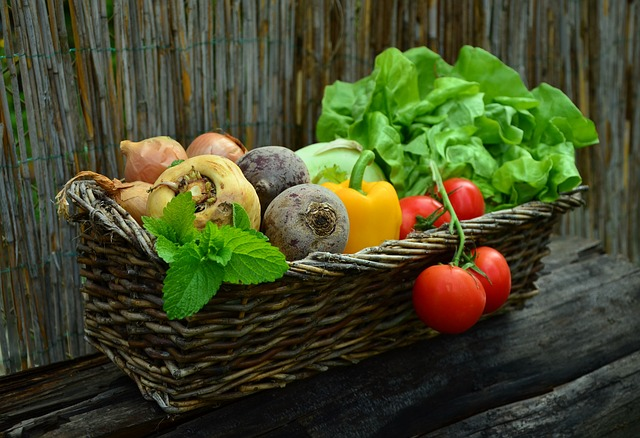
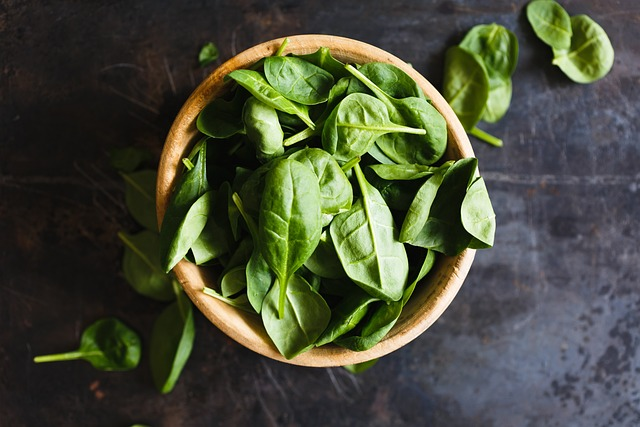
Balanced Diet: Worms love a balanced diet just like us. Offer them a variety of kitchen scraps like fruit peels, vegetable cuttings, and crushed eggshells. Avoid citrus fruits, onions, and spicy foods—they aren’t worm favorites.
Moisture Control: Regularly check the moisture levels in your worm bin. It should feel like a wrung-out sponge—damp but not dripping. Adjust by adding dry bedding to soak up excess moisture or a sprinkle of water if it’s too dry.
Airflow: Ensure proper ventilation in your worm bin to avoid stuffiness. Adequate airflow prevents odor build-up and keeps your worms healthy and happy.
Temperature: Worms prefer moderate temperatures between 55°F to 77°F (13°C to 25°C). Extreme heat or cold can stress them out, so be mindful of their comfort zone.
Avoid Overfeeding: Moderation is key when feeding your worms. Overfeeding leads to excess moisture and can attract pests, so start slow and adjust based on how quickly your worms process the food.
Remember, your worm composter is like a mini ecosystem, and a little attention goes a long way in ensuring its success. Regular checks, a bit of care, and a watchful eye will keep your worms content and churning out that precious compost for your garden!
Why compost with worms?
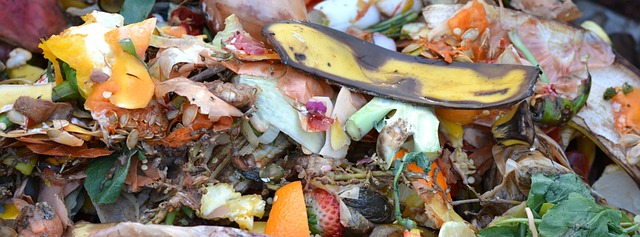
Picture this: You have kitchen scraps like banana peels, coffee grounds, and veggie cuttings. Instead of throwing them away, you use a worm bin. Worms, like red wigglers or red worms, eat these scraps and turn them into nutrient-rich compost for your garden. Composting with worms creates a closed-loop system, recycling waste into fertilizer that boosts plant health. This process reduces landfill waste, lowers your carbon footprint, and improves soil and ecosystem sustainability. Worm composting is easy and adaptable, whether you have an apartment or a farm. It connects you to nature, teaches about soil health, and promotes sustainable stewardship. Composting with worms is a small step towards a greener planet—one worm bin at a time.
Worm Composting for Beginners: What You Need to Get Started
Diving into worm composting is an exciting journey that begins with a few essentials. So, what do you need to kickstart this eco-friendly adventure? Let’s break it down!
First up, you’ll need a cozy home for your composting heroes—a worm bin. This could be a DIY setup using a plastic container or a purpose-built bin for worm composting. Aim for a well-ventilated container with a lid that’s spacious enough for your worm buddies.
Next on the list: the stars of the show—composting worms. Red wigglers and red worms are your go-to pals for this green mission. Find them at local garden centers or order them online.
Now, let’s talk bedding! Your worms need a comfy place to call home, so use shredded newspaper, cardboard, leaves, or coconut coir. Avoid dense or chemically treated materials.
Once your worm bin is set up and your wrigglers are settled, it’s time for the main act—feeding! Start slow with small amounts of fruit and vegetable scraps, coffee grounds, and tea bags. Gradually increase the quantity of food.
And that’s it! With a worm bin, composting worms, suitable bedding, and the right food, you’re all set for your worm composting adventure. It’s an easy, rewarding way to reduce kitchen waste and create nutrient-rich compost for your plants. So, gather your supplies, unleash your inner eco-warrior, and let’s get those worms working their magic!
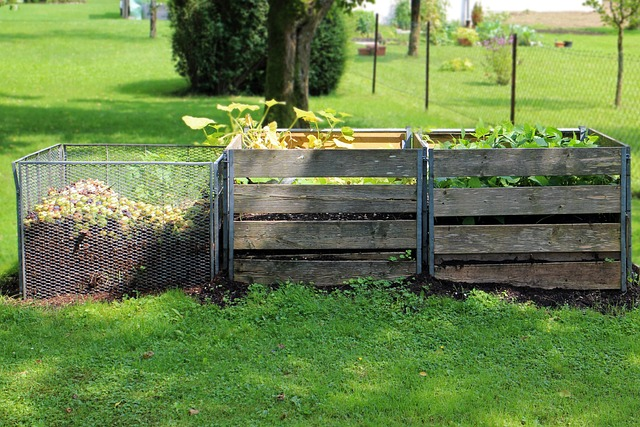
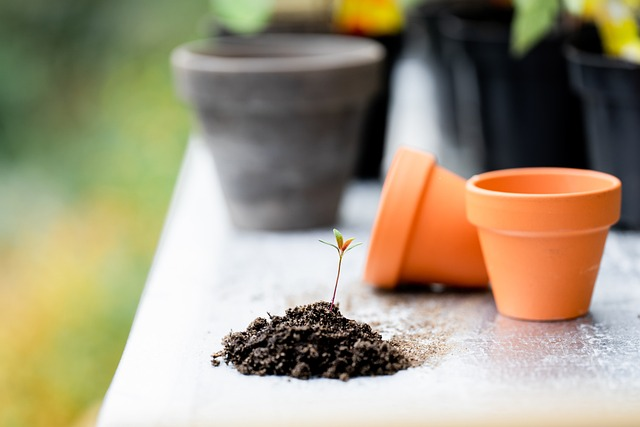
Use the Right Container

 ” />
” />
Choosing the right container is crucial for successful worm composting. Consider your space, needs, and the well-being of your composting buddies. Ventilation is important, so add small air holes or a mesh-covered area on the sides of your bin. Include a lid for a cozy environment. Size matters, so choose a bin with enough space for your worms to move comfortably.
Aim for at least one square foot of surface area for every pound of kitchen scraps per week. Plastic bins are affordable and easy to clean, while wooden bins offer insulation and a natural aesthetic. Proper moisture management is vital, so ensure your bin has drainage holes.
The right container is key for a successful worm composting adventure. Consider your space, needs, and the well-being of your worms. With the perfect container, you’ll be ready for this rewarding eco-friendly journey!
Q: Where Can I Buy Live Compost Worms?
Ah, the magical creatures that power your composting world – compost worms! Now, the big question: where can you get these little eco-warriors? Fear not, because I’ve got you covered.
Local garden centers or nurseries often stock these wiggly wonders. It’s a convenient option, plus you get to support local businesses. Swing by, chat with the staff, and ask for specific types like red wigglers or red worms – they’re top-notch composters.
If online shopping is more your vibe, a quick search will reveal a multitude of suppliers specializing in compost worms. From dedicated worm farms to eco-friendly retailers, you’ll find a variety of options. Just remember to check reviews and ensure they’re reputable. Uncle Jim’s Worm Farm or Happy D Ranch are popular choices for reliable worm purchases.
But wait, there’s more! You might stumble upon local garden clubs, farmers’ markets, or even gardening enthusiasts in your neighborhood who might be willing to share or sell some of their worm population. It’s a fantastic way to connect with fellow gardeners while snagging some composting heroes for your own bin.
Now, a little tip: consider the quantity you need. Generally, start with about a pound of worms for a standard-sized worm bin. It might sound like a lot, but these little guys will become your composting dream team in no time.
Whether it’s a local shop, an online supplier, or your neighbor’s backyard, the key is to ensure you’re getting healthy, lively worms to kickstart your worm composting adventure. With these champions on board, you’re all set to turn your kitchen scraps into nutrient-rich compost for your garden!
What Do You Need To Compost With Worms?
First off, you’ll need a cozy home for your composting heroes – a worm bin! There are options aplenty here. You can DIY your own bin using a plastic container or invest in a purpose-built worm bin designed specifically for worm composting. Look for a well-ventilated bin with a snug lid to create the perfect environment for your wriggly buddies.
Now, let’s talk about the real stars of the show – the composting worms! Red wigglers or red worms are your trusty pals for this worm composting adventure. You can find these little champs at local garden centers or even order them online from reliable suppliers like Uncle Jim’s Worm Farm or Happy D Ranch. They’re absolute pros at turning kitchen scraps into nutrient-rich compost.
Next on the list: bedding materials. Think of it as creating a cozy bedroom for your worms. Choose shredded newspaper, cardboard, leaves, or coconut coir to make a comfy environment for your worm squad. Avoid materials that are too dense or treated with chemicals as these could upset your worms’ delicate balance.
Lastly, when it comes to feeding your worms, start small and slow. Too much food can overwhelm them. Begin with small amounts of fruit and veggie scraps, coffee grounds, and tea bags. As your worms settle in, gradually increase the food offerings. Remember, moderation is key!
With a suitable worm bin, lively composting worms, comfy bedding, and a cautious feeding routine, you’re all set to create nutrient-rich compost for your garden. It’s a delightful and rewarding way to reduce kitchen waste while nurturing your plants. So, gather your supplies and let’s embark on this wonderful worm composting journey together!
What type of bedding is best?
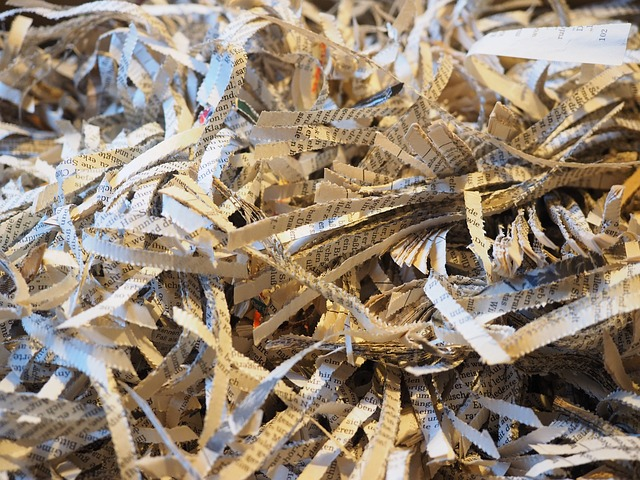
Finding the perfect bedding for your worm buddies is key to their comfort and productivity in your worm composting adventure! When it comes to bedding materials for your worm bin, think cozy and natural. You’ve got options! Shredded newspaper, cardboard, leaves, or coconut coir are fantastic choices. They provide a comfy and safe haven for your worms to thrive. Imagine it as creating a snug, comfy blanket for them to snuggle in while they work their magic on your kitchen scraps.
Now, the crucial part is to avoid materials that might upset the balance in your worm bin. Steer clear of anything too dense or treated with chemicals, as these could harm your little decomposers. The goal is to create an environment that’s welcoming and conducive to their happy munching and composting activities.
Let’s dive a bit deeper. Shredded newspaper is a go-to option for many worm composters. It’s readily available, easy to shred, and creates a lovely bedding layer that your worms will appreciate. Plus, it’s a great way to recycle old newspapers!
Cardboard is another winner. Just make sure it’s free from glossy coatings or inks that might contain toxic elements. Tear it into small pieces or run it through a shredder for a worm-friendly bedding option.
Leaves are fantastic if you have access to a yard with trees shedding foliage. They’re natural, free, and your worms will find them delightful to wriggle through. Just ensure they’re free from pesticides or chemicals.
Coconut coir, derived from coconut husks, is an excellent bedding choice. It’s moisture-absorbent, environmentally friendly, and provides a soft and airy environment for your worms to thrive.
Remember, the ideal bedding material maintains moisture, allows for airflow, and creates a cozy environment for your worms. Experiment with different options to find what works best for you and your worm squad. They’ll thank you for the comfy digs while turning your kitchen scraps into nutrient-rich compost for your plants!
Set Up Your ‘Compost Shop’
Setting up your worm composting space is like creating a little haven for your eco-heroic worms! Let’s get your ‘compost shop’ up and running smoothly.
First things first, consider the container for your worm buddies. You’ve got options here! A purpose-built worm bin or a DIY setup using a plastic container can work wonders. Look for something well-ventilated with a lid to maintain the right moisture levels and temperature. Make sure it’s spacious enough for your worm squad to wiggle around and do their composting magic.
Next up, give your worm pals a cozy bedding to settle into. This could be shredded newspaper, cardboard, leaves, or coconut coir. Think of it as preparing a comfortable bed for them to snuggle in while they turn your kitchen scraps into black gold.
Position your worm composting setup strategically. Whether it’s indoors or outdoors, choose a shaded spot away from direct sunlight and extreme temperatures. You want your worms to be comfortable, not overheated or frozen!
Now, let’s talk about what goes into the bin! Start with a handful of bedding material, add your composting worms, and then layer in your kitchen scraps. Remember, moderation is key here. Start small and gradually increase the amount as your worms settle in and get accustomed to their new home.
Maintaining your ‘compost shop’ is simple. Keep an eye on the moisture levels—your worm bin should feel like a wrung-out sponge. If it’s too dry, spritz some water; if it’s too wet, add more bedding material. And remember to cover your worm bin with a lid to maintain the ideal conditions inside.
Setting up your ‘compost shop’ is an exciting step in your worm composting journey. It’s like creating a mini ecosystem that works wonders in recycling your food scraps and creating nutrient-rich compost for your garden. With a bit of care and the right setup, your worm composting adventure will flourish!
Avoid Kitchen Scraps Directly off the Table
Why, you ask? Well, think of your worms as tiny composting superheroes. They’re like the maestros of a well-orchestrated orchestra in your compost bin. But just like any conductor, they prefer their music sheets well-organized.
See, when you chuck in large chunks of food straight from the table, it’s like handing them a hefty novel when they’re expecting a short story. Those large bits take longer to break down, making it tougher for your wormy friends to work their magic efficiently. Picture this: a carrot top almost as big as your worm – not exactly a walk in the park to nibble through!
But fret not! You can help your worms by doing a little prep work. Chop those food scraps into smaller pieces before they hit the worm bin. It’s like serving them bite-sized snacks instead of a whole feast. This makes it way easier for your worms to munch away, turning those scraps into beautiful, nutrient-rich compost much faster.
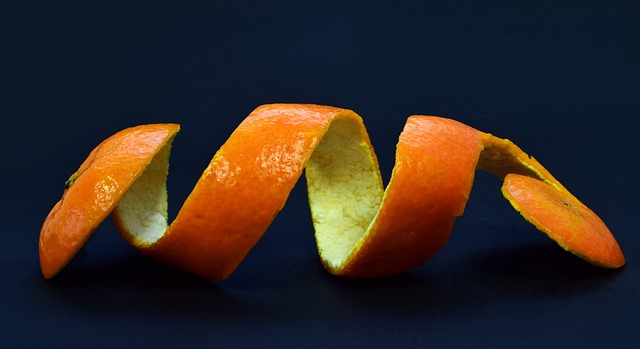
Now, you might be wondering, “What about citrus fruits and onions?” Good question! While your worms are super composting champs, they’re not huge fans of certain foods like citrus fruits and onions. These acidic or pungent goodies can throw off the delicate balance inside your worm bin, making it less pleasant for your composting crew.
But don’t worry, you don’t have to bid farewell to these items forever! You can still compost them, but in moderation and by burying them within the bedding. Think of it as hiding the veggies in your mac and cheese – they’ll never notice, and neither will your worms!
Q: How Deep Should Worm Bedding Be in the Worm Bin?
You want your worm pals to feel snug as a bug in a rug (or a worm in bedding, in this case!), but not so buried they can’t breathe.
So, how deep should your worm bedding be? Picture a comfy blanket for your worms – aim for about 8 to 12 inches of bedding in your worm bin. This gives your worms enough space to wriggle around, nestle into their cozy home, and do what they do best: composting magic!
Now, what makes good bedding for worm composting? Think diversity! Just like a varied diet keeps us healthy, a mix of bedding materials keeps your worms happy. Reach for shredded newspaper, cardboard, leaves, and a touch of coconut coir for that extra comfy vibe. These materials create a fluffy, moisture-absorbent bedding that your composting worms will adore.
Remember, moderation is key, especially when it comes to moisture in your worm composting bin. Your bedding shouldn’t be too dry or too soggy. Aim for the texture of a well-wrung-out sponge – damp but not dripping. If it’s too dry, your worms might struggle to move around; if it’s too wet, it can lead to a stinky situation, and no one wants that!
Oh, here’s a pro-tip: Fluff up your bedding every now and then! Think of it as fluffing pillows; it aerates the bedding, preventing it from getting compacted. Your worms will thank you for the fresh air!
Now, as your worms munch through their food scraps and bedding, things will naturally compact a bit. No worries, just top it up every few months to maintain that ideal depth in your worm composting bin. And if you notice your bin getting a bit too crowded with worm castings and bedding, it might be time to harvest some rich, nutrient-packed compost for your garden!
Start Feeding Your Worms
Now that your worm bin is all set up and cozy, it’s time for the main act: feeding those hungry little composting champs! Think of it as prepping a buffet for your wormy friends, and boy, are they excited!
First things first: what’s on the menu? Your kitchen scraps are like gourmet meals for these composting whizzes. Got leftover veggies, fruit peels, or coffee grounds? Perfect! But hold off on the citrus and onions for now; they can be a bit too intense for your worm buddies.
Now, moderation is key – you don’t want to overwhelm your worms with a feast. Start small, like a handful or two of food scraps, and gradually increase the portions as your worm population settles in. Remember, patience is a virtue in the worm composting world!
Oh, quick tip: Bury the food scraps beneath the bedding material. It’s like tucking them into bed, cozy and tucked away. This helps control any potential odor and keeps pesky fruit flies away. Nobody wants uninvited guests at their worm party!
Keep an eye on your worms. If you notice some food taking longer to disappear, it might be a sign you’re overfeeding. Back off a bit and let them catch up. And if you see food scraps piling up, fear not! That’s a hint they’re well-fed and might need some time to work through the buffet you’ve set up.
Remember, this is a team effort between you and your worms. As they chow down on your kitchen scraps, they’ll turn them into that coveted worm castings – nutrient-rich compost that your plants will absolutely adore!
Use nature’s digesters to help eliminate food waste and produce nutrient-rich compost for your garden or house plants
Worm composting, also known as vermicomposting, is a fascinating process that utilizes the digestive systems of red wigglers or red worms to break down organic matter, such as kitchen scraps, into nutrient-rich compost. This can be achieved through the use of a worm bin, which provides a suitable environment for the worms to thrive.
To start your worm composting adventure, you will need a worm composting bin, preferably a plastic storage bin, filled with bedding material such as shredded paper or coconut coir. This bedding material serves as a comfortable home for the worms and helps maintain moisture levels.
Once your worm bin is set up, you can begin feeding the worms with food scraps from your kitchen. Vegetable scraps, fruit peels, coffee grounds, and shredded newspaper are all excellent food sources for the worms. However, it’s important not to overfeed them, as this can lead to excess moisture and attract pests like fruit flies.
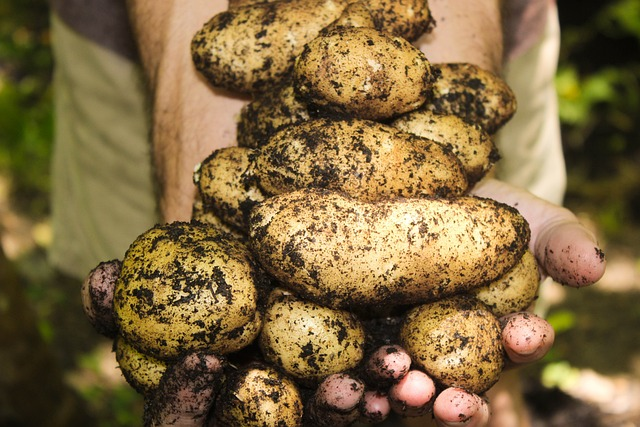
The worms will eat the food scraps and break them down through their digestive process. As they digest the organic waste, they will produce worm castings, which are valuable soil amendments packed with essential nutrients for your plants. These worm castings can be used in potting soil or added to your outdoor plants to enhance their growth.
To maintain a healthy worm population, it’s crucial to provide fresh bedding and monitor the moisture levels in the bin. If the bin becomes too wet, you can add dry bedding material or remove excess moisture. On the other hand, if the bin becomes too dry, you can mist it with water using a spray bottle.
It’s also important to note that worms prefer a dark environment, so it’s best to keep your worm bin in a shady spot. Additionally, avoid feeding the worms citrus fruits, onions, garlic, and meat, as these can be harmful to their digestive systems.
By following these worm composting basics, you can create a thriving worm compost bin and produce nutrient-rich compost for your plants. Whether you choose to compost indoors or outdoors, with a worm factory or a can o worms, the process remains the same—transforming organic waste into valuable soil amendments with the help of these incredible composting worms. So start your worm composting journey today and witness the magic of nature’s recycling system in action!
Helping your worm compost thrive: amendments
When it comes to nurturing your worm compost, amendments are like vitamins for your compost, giving it that extra boost of goodness. Here’s the scoop on how to supercharge your worm bin.
Let’s start with the green stuff – nitrogen-rich materials like kitchen scraps and fresh grass clippings. They’re fantastic for your worms but might need a buddy to balance things out. Enter carbon-rich amendments! Think shredded paper, dried leaves, or even cardboard. It’s all about that balance – too much nitrogen and your bin could turn smelly, but the right blend keeps things in harmony.
Then there’s the superhero of amendments: crushed eggshells. These little gems not only provide calcium but also help maintain the pH balance in your worm bin. Crush ’em up, sprinkle them in, and watch your worms rejoice! It’s like giving them a dose of medicine while they munch away.
Now, about those fruit flies. Nobody wants them crashing the compost party! Try sprinkling a thin layer of rock dust on top of your bedding – it’s like a barrier that helps deter those pesky critters. Worms are fine with it, but fruit flies? Not their vibe!
A little sprinkle of agricultural lime can also work wonders. It helps keep the pH level in check and creates a cozy environment that worms adore. Just remember, a little goes a long way – no need to go overboard with it!
Lastly, a sprinkle of coffee grounds can be pure gold for your worm pals. They love it, and it adds a jolt of nitrogen to the mix. But, like all good things, moderation is key. Too much coffee can make your bin acidic, so sprinkle with care!
Remember, amendments are like the seasonings in a dish – they enhance the flavor, but you’ve got to find that perfect blend. So, experiment a bit, listen to your worms (metaphorically, of course!), and watch your compost thrive!
Harvesting your finished compost: lure vs. dump methods
Harvesting your worm compost is like finding treasure at the end of a worm composting adventure. There are a couple of ways to do it, and each has its perks. Let’s dive into the lure versus dump methods.
The lure method is like inviting your worms to a fancy dinner party. You set the table, offering them a cozy spot with fresh bedding and yummy food on one side of your worm bin. Your composting champs, being the curious creatures they are, will migrate towards this new feast. After a while, you’ll find most of your worms cozied up on the new side, leaving the finished compost on the other. It’s like a wormy migration!
On the flip side, the dump method is more like saying, “Hey worms, time to move!” You take out all the contents of your worm bin, spread it out on a plastic sheet or in a large container, and expose it to light. Worms are light-sensitive and will burrow down to escape the light. As they go down, you can scoop off the top layer of compost, leaving the worms to retreat deeper.
The lure method keeps most of your worms in the worm bin, making the separation process quicker. Plus, it’s less disruptive for the worms. However, the dump method can be more thorough, ensuring you get almost all the worms out of your finished compost. It might take a bit longer and can be a tad more disruptive, but it’s effective.
Whether you choose the lure or dump method, it’s good to have a bright light handy. Worms don’t like light, so using a light source above your compost helps to guide them downwards. Patience is also key; give your worms time to move away from the light and into the depths of the compost.
Both methods work, so you can choose the one that suits your style. Whichever method you pick, it’s a satisfying moment – seeing all that dark, rich, earthy-smelling finished compost, ready to nourish your plants. Just remember, whatever’s left behind after harvesting is still good food for your garden!
Take Care of the Night Crawlers
Taking care of your night crawlers – those tireless champions of composting – is like tending to a bustling underground city. These worms work tirelessly, breaking down organic matter into nutrient-rich compost that your plants adore. To ensure they keep up the good work, here are some key tips to nurture your worm population.
First off, keep their environment cozy and comfortable. Night crawlers thrive in moist bedding, so make sure it’s not too dry or too damp. Optimal moisture is similar to a wrung-out sponge: damp but not dripping. Regularly misting the bedding can help maintain this balance. Remember, worms need air too! Adequate ventilation is crucial, so ensure there’s enough airflow within your worm bin or composting setup.
Feeding your night crawlers is like preparing a gourmet meal for them. Stick to a balanced diet of kitchen scraps, avoiding excess acidity or oils. Foods like fruit and vegetable peels, coffee grounds, and tea bags are their favorites. However, be cautious with citrus fruits and onions, as these can be a bit too acidic for their liking. Feed them in moderation and bury the food beneath the bedding to prevent attracting pests.
While night crawlers are resilient, they don’t appreciate extreme temperatures. Avoid placing their bin in direct sunlight or freezing temperatures. They’re like Goldilocks – they prefer it not too hot, not too cold, but just right. A shady spot with consistent temperatures will keep them content.
Harvesting the worm castings – that nutrient-rich gold they produce – is crucial but do it gently. When it’s time to collect the compost, lure them to one side of the bin with fresh bedding and food, or use the light method to encourage them to move away from the harvested compost.
Taking care of your night crawlers isn’t just about tending to their immediate needs; it’s about creating a thriving ecosystem. They’re not just composters; they’re your garden’s unsung heroes, turning waste into nourishment. By ensuring they have the right environment and diet, you’re not just caring for worms; you’re fostering a healthier garden.
In order to create a thriving worm population, it’s important to provide them with the right environment and diet. This includes a cozy and comfortable worm bin with optimal moisture levels, adequate ventilation, and a balanced diet of kitchen scraps. Feeding them fruit and vegetable peels, coffee grounds, and tea bags while avoiding citrus fruits and onions will keep them healthy. It’s also important to avoid extreme temperatures and harvest their nutrient-rich compost gently. By following these worm composting basics, you can create a thriving ecosystem and foster a healthier garden.
Monitor Air Temperature

Maintaining the right temperature for your worm compost is crucial for the success of your worm bin and the health of your worm population. Worms prefer a cozy and stable environment, with temperatures ranging from 55°F to 77°F (13°C to 25°C). Extreme temperatures can stress or harm the worms, affecting their ability to break down organic matter efficiently.
During hot summer days, it’s important to protect your worm bin from direct sunlight, as excessive heat can turn it into an oven. Consider moving the bin to a shaded area or insulating it with a damp burlap sack or a layer of mulch. In chilly winters, insulate the bin with blankets or bring it indoors to prevent the worms from freezing.
Regularly monitoring the air temperature is essential. Use thermometers placed inside or near the worm bin to keep track of any fluctuations. Just make sure the thermometer is not touching the bedding or worms, as this may give inaccurate readings.
Remember that the comfort of your worms directly affects their productivity. By paying attention to the air temperature and making necessary adjustments, you are creating a nurturing environment for these composting superheroes. This attention to detail ensures that they can efficiently work their magic, turning your kitchen scraps into nutrient-rich compost for your garden.
Troubleshooting worm composting issues
Troubleshooting worm composting can sometimes feel like solving a garden puzzle, but fear not, dear gardener! Here’s a guide to help you navigate through some common worm composting issues.
First off, let’s tackle the moisture situation. Too much moisture can turn your worm bin into a soggy mess, while too little can leave your wriggly friends dehydrated. Aim for that sweet spot—a dampness akin to a wrung-out sponge. If it’s too wet, add dry bedding material like shredded paper or cardboard. For dry bins, spritz them with water to create that cozy environment your worms love.
Ever encountered fruit flies buzzing around your worm bin? They’re a sign of overfeeding or food scraps not buried properly. Try reducing the amount of food you’re adding or ensure it’s well-covered with bedding to keep those pesky flies at bay.
Smelly bin? That might be a sign of overfeeding or poor aeration. Mix things up a bit and fluff the bedding to let in some air. You can also add some shredded newspaper or cardboard to balance things out and absorb excess moisture.
Ah, the escape artists—worms trying to make a break for it! If your worms are staging a mass exodus, it could mean they’re unhappy with their living conditions. Check the moisture, temperature, and the acidity of your bin. Also, make sure there’s enough food to keep them content.
Remember, worm composting is an ecosystem, and balance is key. If things seem off, take a step back, observe, and make small adjustments. Your little composting buddies will thank you by turning your kitchen scraps into nutrient-rich compost for your garden!
Problem: Fruit flies
The uninvited guests in your worm composting adventure can be a nuisance, especially fruit flies. These tiny bugs are attracted to decaying organic matter, such as food scraps. To manage this pesky situation and keep your worm bin thriving, follow these tips:
Properly cover your kitchen scraps with fresh bedding or moist newspaper/cardboard. This prevents fruit flies from detecting and laying eggs in the exposed scraps.
Maintain the moisture level in your worm bin. Fruit flies thrive in damp environments, so avoid excessive wetness by adding dry bedding materials like shredded paper or cardboard.
Ensure proper ventilation in your worm bin. Adequate airflow discourages the buildup of humidity that attracts fruit flies. Make sure your bin has ventilation holes to promote airflow and reduce the chances of a fruit fly takeover.
By following these worm composting basics, you can create nutrient-rich compost for worms and avoid fruit fly infestations. Remember to regularly feed your worms with a balanced mix of food scraps, shredded paper, and other organic materials. With time, your worm bin will produce valuable soil amendments like worm castings and worm tea, benefiting your indoor and outdoor plants.
Problem: Strong, unpleasant odors from the compost bin

Maintaining a healthy and odor-free worm composting bin is crucial for a successful worm composting adventure. Here are some tips to optimize your worm bin and keep it smelling fresh:
Balance the Moisture: Excess moisture in the compost can cause unpleasant odors. Make sure the bedding is damp but not soggy. If it’s too wet, add dry bedding like shredded paper or cardboard to absorb the excess moisture. This will also help aerate the bedding and prevent anaerobic conditions that lead to foul smells.
Adjust the Food: Overfeeding your worm bin can result in strong odors. Check if you’re providing more food scraps than the worms can handle. Reduce the quantity of scraps or bury them well within the bedding for faster decomposition and to prevent odor buildup.
Proper Aeration: Adequate airflow is essential for a healthy worm bin. Stir the bedding occasionally to aerate it and allow oxygen to reach the worms and microbes, which aids in breaking down organic matter efficiently. Consider adding ventilation holes to the bin for better air circulation.
By maintaining a balanced moisture level, adjusting the feeding quantity, and ensuring proper aeration, you can significantly reduce unpleasant odors in your worm composting bin. Remember, a well-maintained worm compost should have an earthy smell, like rich soil. Pay attention to these factors, and your compost bin will thrive without unwanted odors.
Problem: Worms are crawling out of the bedding and onto the sides or lid of the bin
Seeing worms wander away from the bedding might seem puzzling, but there are ways to address this and keep them happily nestled in their composting home:
1. Check the Bedding Conditions: Sometimes, worms migrate to seek better conditions. It could be too wet, too acidic, or even too dry. Ensure the bedding remains moist like a wrung-out sponge. If it’s too damp, add dry bedding material like shredded paper or cardboard to absorb excess moisture. Conversely, if it’s dry, lightly mist the bedding to provide the ideal environment for the worms.
2. Manage the Feeding: Overfeeding can also send worms on an excursion. Ensure you’re not adding too much food at once. If you notice an accumulation of uneaten scraps, reduce the feeding amount or bury the food deeper within the bedding. This will prevent attracting worms to the surface in search of food.
3. Adjust the Bin Environment: Worms are sensitive to environmental changes. Check if the bin is exposed to extreme temperatures or light. Worms prefer a dark and consistently temperate environment. Ensure the bin is in a shady spot and shielded from direct sunlight or harsh cold.
The Benefits of Composting with worms
Worm composting opens a world of sustainable possibilities, doesn’t it? As you wrap up this comprehensive guide, you’re now armed with a treasure trove of insights into the world of worm composting. From grasping the foundational concepts to steering clear of potential hiccups, you’re well-prepared to embark on this eco-friendly journey.
By now, you’ve unraveled the mysteries behind these natural recyclers, understanding how they transform kitchen scraps into nutrient-rich compost that’s a goldmine for your plants. You’ve delved into the nuances of setting up your composting system, ensuring you have the perfect container, bedding materials, and feeding strategies in place.
Remember, the journey of worm composting is a fulfilling one—it’s about more than just managing food waste. It’s about nurturing your garden or indoor plants in a way that’s both eco-conscious and immensely rewarding. As you step into this world, you’re not just feeding your plants; you’re fostering a sustainable cycle that enriches the earth and fosters healthier, happier plant life.
Embrace the learning curve; challenges may arise, but armed with the knowledge and insights from this guide, you’re ready to troubleshoot any hitches that come your way. Your commitment to worm composting isn’t just about nurturing plants; it’s about fostering a deeper connection with the environment and becoming an advocate for sustainability.
So, whether you’re a gardening aficionado or someone taking their first steps into this realm of eco-friendly practices, remember, you’re part of a community dedicated to making a positive impact—one worm bin at a time. Keep exploring, keep composting, and keep nurturing a greener, healthier planet. Happy composting!